Find a Rental Location:
Search for a Rental Location by Zip or Postal Code
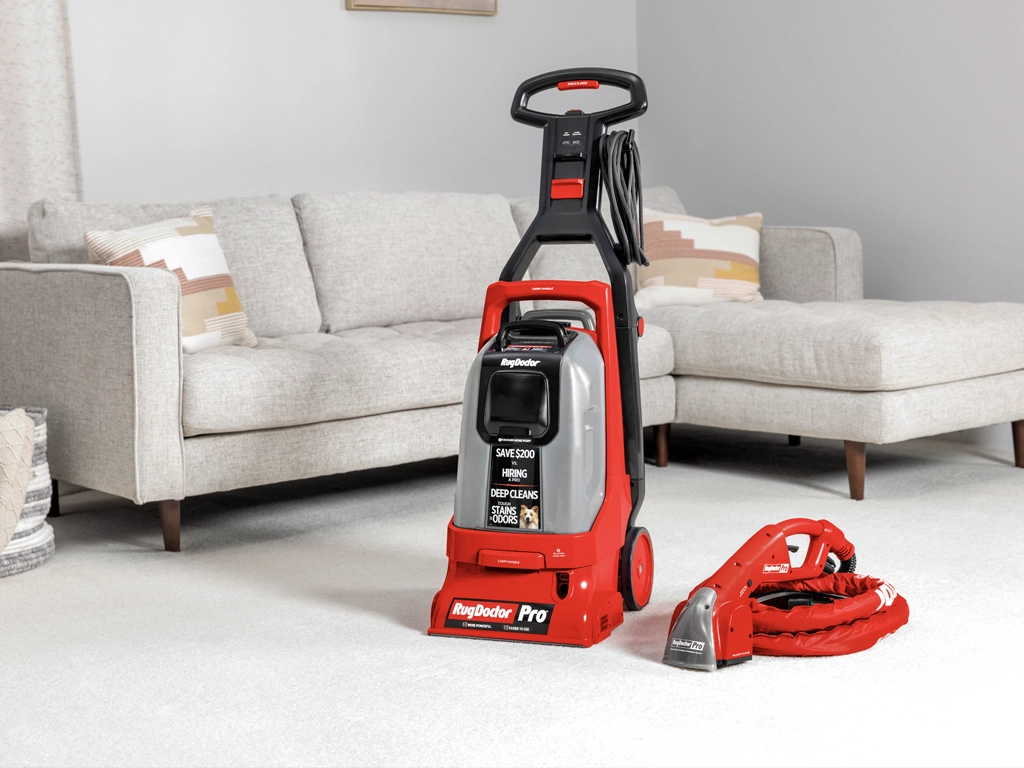
Pro Deep Carpet Cleaner Rug Doctor by BISSELL

Support For Pro Deep Carpet Cleaner & Upholstery Tool

Find how-to videos, step by step operation instructions and troubleshooting below. Please refer to the How-to Guide for important safety instructions.

How to Use the Pro Deep Carpet Cleaner

Step 1: Prepare your Carpet for Deep Cleaning

Before cleaning, vacuum the area thoroughly. Generously spray any special problem areas (old or dark stains; high traffic areas, pet stains) with a Rug Doctor® or Rug Doctor by BISSELL® Pre-treat Cleaning Solution.

Step 2: Prepare the Machine

Press the Clean Water Tank Release button to remove the tank. Fill the tank with hot tap water and then add two capfuls of a Rug Doctor® or Rug Doctor by BISSELL® machine cleaning solution. Place the clean tank back onto the machine.

Step 3: Deep Clean your Carpet

Plug the carpet cleaner rental machine into an outlet. Press the left side of the power button to turn the machine on to “CARPET” mode. Press the “SOAP & SCRUB” solution button make 1 forward and 1 backward pass. Release the “SOAP & SCRUB” button. and make 1 forward and 1 backward dry pass (without pressing the “SOAP & SCRUB” button) to suction up max amount of dirty water. Repeat passes as needed depending on the carpet soiling.

The machine solution light will indicate when the cleaning solution is low. When the machine needs more cleaning solution, remove both tanks. Empty the dirty tank and refill the clean tank with hot tap water and solution. Repeat this process as many times as needed to finish the cleaning job.
How to Clean Upholstery & Stairs

Step 1: Check Fabrics and Prepare the Area

Check the manufacturer’s tag for cleaning instructions. If there is a W or W/S on the tag it means you can use water for cleaning and it is safe to use the upholstery tool. If it is coded S or X, do not use the tool and contact the manufacturer for cleaning instructions. Test the cleaning solution and tool in an inconspicuous spot or hidden area and allow it to dry before proceeding. If upholstery color is affected, do not use the tool.

Thoroughly vacuum the upholstery or stairs.

Step 2: Prepare the Machine

Press the Clean Water Tank Release button to remove the tank. Fill the tank with hot tap water and two capfuls of a Rug Doctor or Rug Doctor by BISSELL cleaning solution. Place the clean tank back onto the machine.

Lift the rubber cover on the front of the machine and attach the Hose Cuff to the Vacuum Hose Port. Next, insert the Solutions Hose into the Solution Hose Port located on the bottom, right side on the front of the machine. Plug the carpet cleaner rental machine into an outlet. Press the right side of the power button to turn the machine on to “TOOL” mode.

Step 3: Deep Clean your Upholstery or Stairs

Press the head of the upholstery tool firmly onto the fabric or carpet and squeeze the trigger to spray the cleaning solution. Slowly pull the head backward while squeezing the trigger. Release the trigger a few inches from the end of the swipe to avoid overspray. Then, make a dry pass over the same area without squeezing the trigger. This will suction up more dirt and solution. Continue until the solution has thoroughly been suctioned up.

Do not overwet upholstery. For stairs, place the machine at the bottom of the steps and clean from top to bottom.

Run the machine in “TOOL” mode 15 seconds after you finish cleaning to allow for all the dirty solution in the hose to be collected into the dirty water tank.

How to Clean Machine & Tools Before Returning

Be kind and please return the machine and accessories back in the condition that you would want for your next cleaning job. Unplug the machine and:

  • Empty and rinse both the dirty and clean water tanks, removing all dirt and debris.
  • Remove all string, pet hair, debris, and dirt from the foot brush roller.
  • Wipe down the brush roller, wheels, and bottom of the machine with a damp cloth.
  • Wipe off all dirt and debris from the outside of the unit.
  • If you rented and used the upholstery tool, rinse the tool head, remove dirt and debris and wipe it down.

To avoid a $40 cleaning fee, the rental machine MUST be returned in a clean, rentable condition.

Troubleshooting

Issue:Machine not plugged in
How to Fix:Plug power cord into wall outlet.

Issue:Power Button not turned on
How to Fix:Push Power Button to Carpet or Tool depending on need.
Issue:Handle is in locked position
How to Fix:While pressing Easy Lift Tank Caddy down, pull straight back on the Main Handle to release Main Handle into cleaning position.
Issue:Not pressing Soap & Scrub Solution Button
How to Fix:Press and hold Soap & Scrub Solution Button.

Issue:Clean Water Tank is empty or low
How to Fix:Fill Clean Water Tank with water and solution.

Issue:Clean Water Tank is not seated or installed correctly
How to Fix:Lift up Clean Water Tank, and place back into position. Tank should click into place when positioned properly.

Issue:Power Button is in the incorrect position
How to Fix:Verify that the Power button is in the correct position (CARPET or TOOL) depending on usage.

Issue:Valve of Clean Water Tank is clogged
How to Fix:Remove valve from bottom of Clean Water Tank. Clean with warm soapy water and replace.
Issue:Dirty Water Tank Is full
How to Fix:Empty Dirty Water Tank and replace empty tank when finished.

Issue:Dirty Water Tank is not seated / installed correctly
How to Fix:Lift up Dirty Water Tank and place back into position.

Issue:Easy Lift Caddy is not installed correctly
How to Fix:Lower the Main Handle. Release both Easy Lift Caddy Locks on the back of the machine. Lift the Caddy and reseat by placing the front end back onto the machine making sure the latches engage with the holes in the machine base. Lower the back of the Caddy to sit on the machine base and secure the Caddy Locks.

Issue:Power Button is in the incorrect position
How to Fix:Double check the Power Button, and ensure it is on the desired mode (CARPET is for carpet cleaning; TOOL is for powered, optional accessory).

Issue:Vacuum Hose Port on the Dirty Water Tank is not fully sealed
How to Fix: Press the black flap into the Vacuum Hose Port tightly.

Issue:Valve of Clean Water Tank is clogged
How to Fix:Remove valve from bottom of Clean Water Tank. Clean with warm soapy water.
Issue:Not Pressing Soap and Scrub Solution Button
How to Fix:Press Soap and Scrub Solution Button on Handle.

Issue:Machine is not the Carpet mode
How to Fix:How to Fix: Push Power Button to CARPET.

Issue:Something lodged in the Brush Roll, Brush Jam Indicator Light on
How to Fix:Turn machine off and unplug power cord from outlet. Remove water tanks and position the machine on its back. Check that there is nothing stopping the Brush Roll from rotating. Once jammed item is removed, place the machine upright, replace both tanks, plug in machine and press Power Button to CARPET mode to continue cleaning.
Issue:Solution Hose Tool Connection is not installed properly
How to Fix:Disconnect plastic Solution Hose Tool Connection at end of small tubing and wire by pinching on top and bottom. Reconnect Solution Hose Tool Connection, making sure it clicks into place.

Issue:Power needs to be Reset
How to Fix:Turn the Power Button to "CARPET" for 30 seconds. Then turn it back to the "OFF" position. Wait 30 seconds, then turn back to "TOOL."
Issue:Solution Hose Tool Connection is not installed properly
How to Fix:Disconnect plastic Solution Hose Tool Connection at end of small tubing and wire by pinching on top and bottom. Reconnect Solution Hose Tool Connection, making sure it clicks into place.
Issue:Vacuum Hose Tool Connection is not installed properly
How to Fix:Disconnect Vacuum Hose Tool Connection at end of large vacuum hose. Reconnect Vacuum Hose Tool Connection, making sure it is fully inserted into the opening.

Issue:Kink or obstruction in Vacuum Hose
How to Fix:Unkink or remove obstruction in Vacuum Hose.
Issue:Something lodged in Brush Roll
How to Fix:Turn machine off and unplug power cord from outlet. Check that there is nothing stopping the Brush Roll from rotating. The Brush Roll can be removed by one screw on the bottom of the Motorized Upholstery Tool if necessary. Clean and check that the Brush Roll spins freely. Replace the Brush Roll and secure with screw. Plug in the machine and turn the machine on to continue cleaning.